Introduce and Install MySQL
Let's install MySQL.
Introduce and Install MySQL
Install MySQL on Ubuntu
The entire process to Install MySQL on Ubuntu
docker pull mysqldocker volume create mysqldocker run -d --restart always --name mysql -v mysql:/var/lib/mysql -e MYSQL_ROOT_PASSWORD=1234 -p 3306:3306 mysql:latest
Step1) Pull the MySQL image
docker pull mysql
1
2
3
4
5
6
7
8
9
10
11
12
13
14
15
16
17
18
19
(base) jaoneol@DESKTOP-B7GM3C5:~$ docker pull mysql
Using default tag: latest
latest: Pulling from library/mysql
2c0a233485c3: Pull complete
21577e00f2ba: Pull complete
c294da35c13e: Pull complete
facc8f3107c1: Pull complete
de4342aa4ad8: Pull complete
4643f1cf56c2: Pull complete
139aca660b47: Pull complete
b10e1082570e: Pull complete
26313a3e0799: Pull complete
d43055c38217: Pull complete
Digest: sha256:45f5ae20cfe1d6e6c43684dfffef17db1e1e8dc9bf7133ceaafb25c16b10f31b
Status: Downloaded newer image for mysql:latest
docker.io/library/mysql:latest
(base) jaoneol@DESKTOP-B7GM3C5:~$ docker images
REPOSITORY   TAG       IMAGE ID       CREATED       SIZE
mysql        latest    a52cba19e8cc   13 days ago   797MB
Step2) Create a Docker volume
docker volume create mysql
1
2
3
4
5
6
7
8
9
10
11
12
13
14
15
16
17
18
19
20
21
# When you run the command `docker volume create mysql`, Docker creates a managed volume directory.
# The location of this directory is `/var/lib/docker/volumes/mysql/_data`.
# You can check it using `docker volume inspect mysql_volume`.
(base) jaoneol@DESKTOP-B7GM3C5:~$ docker volume create mysql
mysql
(base) jaoneol@DESKTOP-B7GM3C5:~$ docker volume ls
DRIVER    VOLUME NAME
local     mysql
(base) jaoneol@DESKTOP-B7GM3C5:~$ docker volume inspect mysql
[
    {
        "CreatedAt": "2025-02-12T22:57:40+09:00",
        "Driver": "local",
        "Labels": null,
        "Mountpoint": "/var/lib/docker/volumes/mysql/_data",
        "Name": "mysql",
        "Options": null,
        "Scope": "local"
    }
]
(base) jaoneol@DESKTOP-B7GM3C5:~$
Step3) Run the MySQL container
docker run -d --restart always --name mysql -v mysql:/var/lib/mysql -e MYSQL_ROOT_PASSWORD=1234 -p 3306:3306 mysql:latest
1
2
3
4
5
6
7
8
9
10
11
12
13
14
15
16
17
18
19
20
21
22
23
24
25
26
27
28
29
30
31
32
33
34
# docker run -d --name mysql -v mysql:/var/lib/mysql -e MYSQL_ROOT_PASSWORD=1234 -p 3306:3306 mysql:latest
# docker update --restart always mysql # No need to run `docker stop mysql`. The update takes effect immediately.
# docker start mysql
(base) jaoneol@DESKTOP-B7GM3C5:~$ docker run -d --restart always --name mysql -v mysql:/var/lib/mysql -e MYSQL_ROOT_PASSWORD=1234 -p 3306:3306 mysql:latest
1b98f129501345342c6c12c7d2a8b1629a27f6175aca3809de1bfa3f0ee3c322
(base) jaoneol@DESKTOP-B7GM3C5:~$ docker ps
CONTAINER ID   IMAGE          COMMAND                  CREATED          STATUS          PORTS                                                  NAMES
1b98f1295013   mysql:latest   "docker-entrypoint.s…"   29 seconds ago   Up 28 seconds   0.0.0.0:3306->3306/tcp, :::3306->3306/tcp, 33060/tcp   mysql
# If you navigate to `/var/lib/docker/volumes/mysql_volume/_data`,
# you can see that all the files in the MySQL container's `/var/lib/mysql` directory are mounted there.
(base) jaoneol@DESKTOP-B7GM3C5:~$ su
Password:
root@DESKTOP-B7GM3C5:/home/jaoneol# cd /var/lib/docker/volumes/mysql/_data
root@DESKTOP-B7GM3C5:/var/lib/docker/volumes/mysql/_data# ls
'#ib_16384_0.dblwr'  '#innodb_redo'   auto.cnf        binlog.000002   ca-key.pem   client-cert.pem   ib_buffer_pool   ibtmp1   mysql.ibd    mysql_upgrade_history   private_key.pem   server-cert.pem   sys        undo_002
'#ib_16384_1.dblwr'  '#innodb_temp'   binlog.000001   binlog.index    ca.pem       client-key.pem    ibdata1          mysql    mysql.sock   performance_schema      public_key.pem    server-key.pem    undo_001
root@DESKTOP-B7GM3C5:/var/lib/docker/volumes/mysql/_data# exit
exit

# You can verify that it is a Named Volume using the `docker inspect mysql` command.
(base) jaoneol@DESKTOP-B7GM3C5:~$ docker inspect mysql
# The above part is omitted.
"Mounts": [
            {
                "Type": "volume",
                "Name": "mysql",
                "Source": "/var/lib/docker/volumes/mysql/_data",
                "Destination": "/var/lib/mysql",
                "Driver": "local",
                "Mode": "z",
                "RW": true,
                "Propagation": ""
            }
        ],
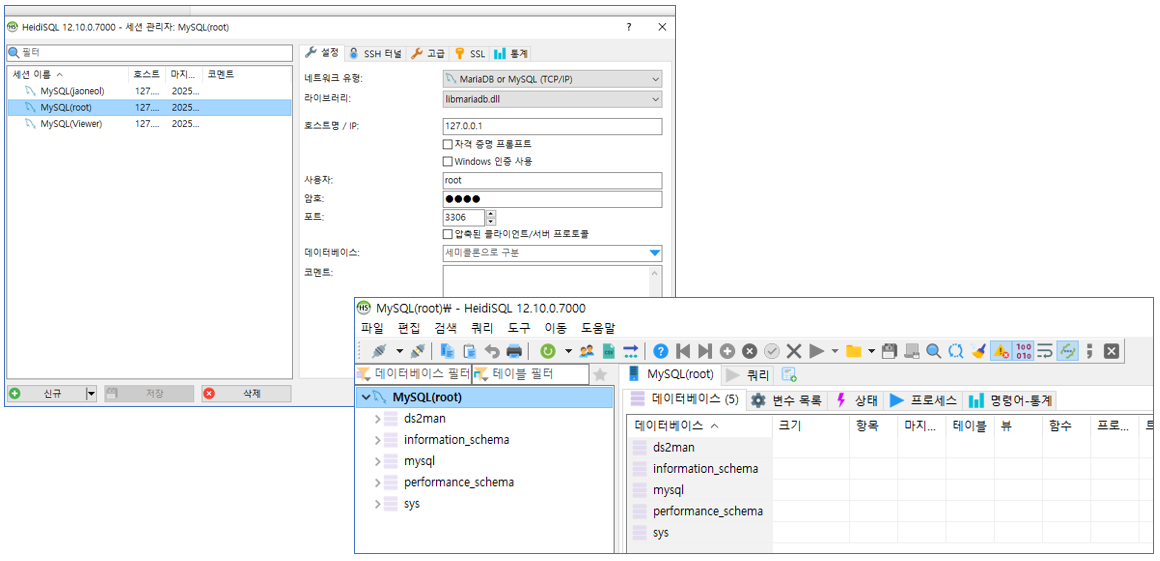
Use HeidiSQL(Recommend)
There are many database-related tools, but when connecting to MySQL, I mainly use HeidiSQL. Each database tool has its pros and cons, but in practice, HeidiSQL offers many features that are highly beneficial for developers. In particular, it is free and can also be used in a corporate environment. You can download and use it from HeidiSQL.
 HeidiSQL
Use DBeaver
For reference, there is also a tool called DBeaver, which seems useful for connecting to various types of databases besides MySQL. (At my company, we mainly use it for connecting to Oracle.). You can download and use it from DBeaver.
DBeaver
This post is licensed under CC BY 4.0 by the author.