Create GA4 to a Jekyll Blog
Let's analyze my blog using GA4.
Create GA4 to a Jekyll Blog
I recently launched my blog and became curious about the number of visitors and where they were coming from. So I decided to connect Google Analytics 4 (GA4). The setup was quite simple.
What is GA4?
Google Analytics 4 (GA4) is the latest version of Google Analytics, offering more flexible and event-based tracking compared to the previous Universal Analytics. GA4 is now the default for all new properties and supports both websites and apps.
Create GA4 to a Jekyll Blog
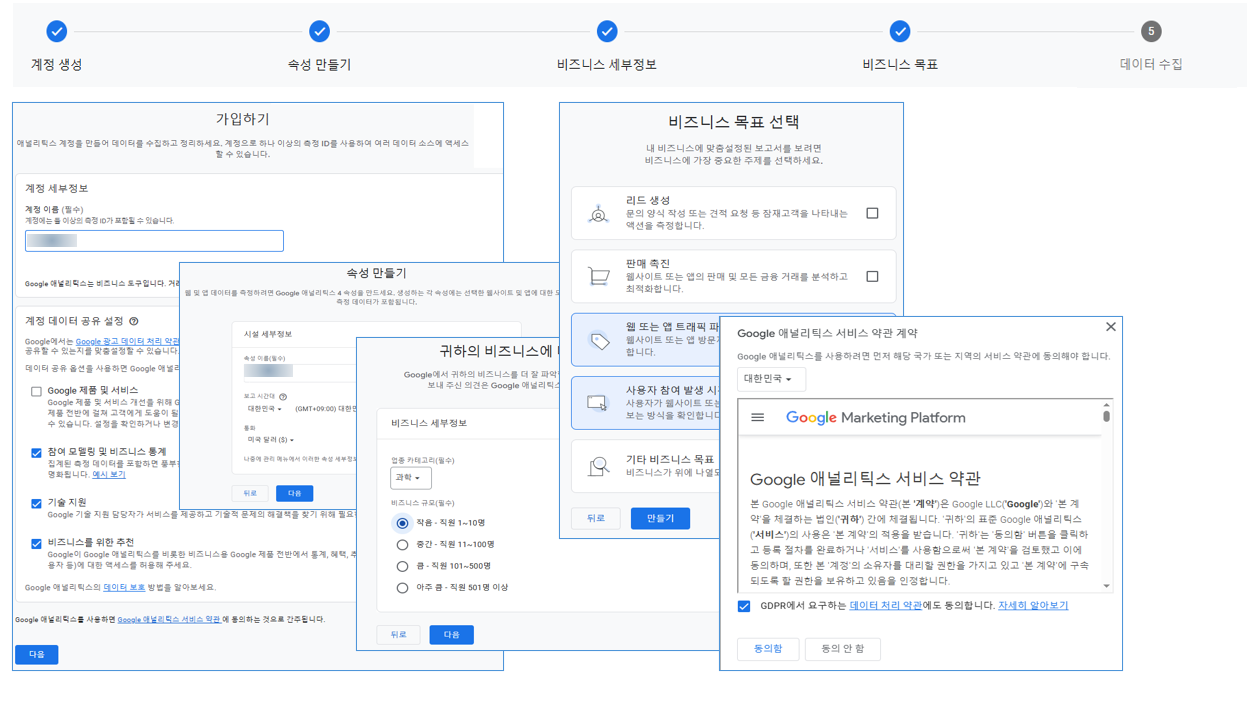
- Log in to Google Analytics.
- Click the ⚙️ Admin icon at the bottom-left corner → Select Create Account or choose an existing one.
- If creating a new account, click Create Account → Enter your blog name → Set your time zone and currency. If using an existing account, click Create Property under that account instead.
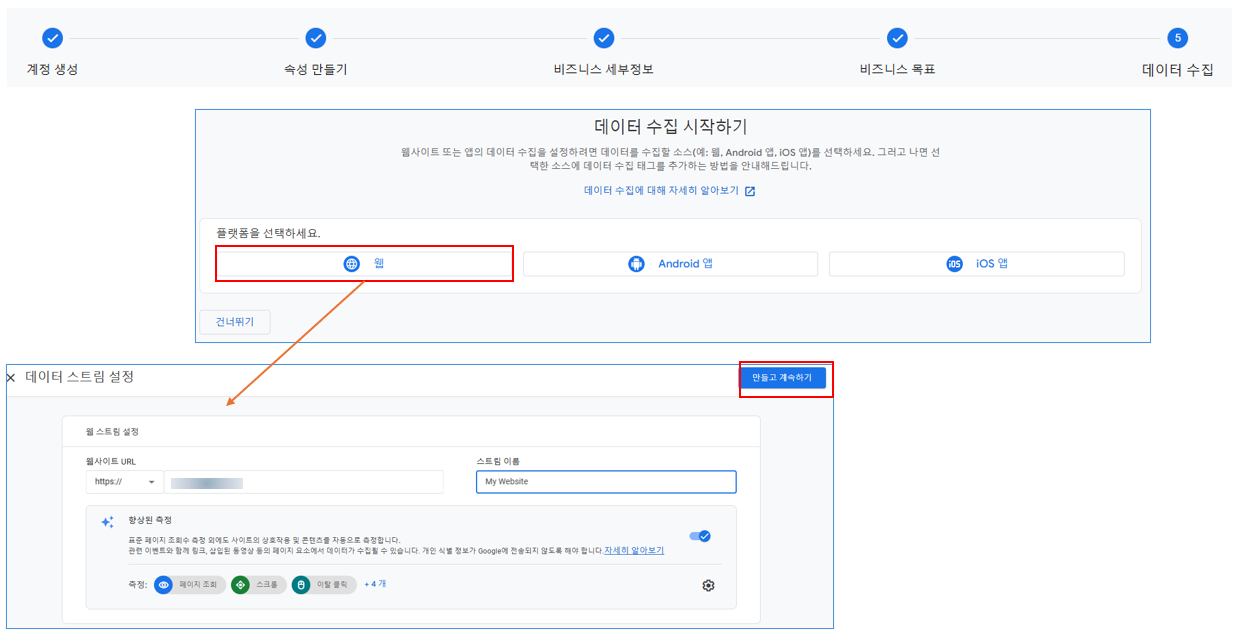
- When prompted to choose a platform, select Web.
- In the “Set up a data stream” popup, enter your blog’s URL.
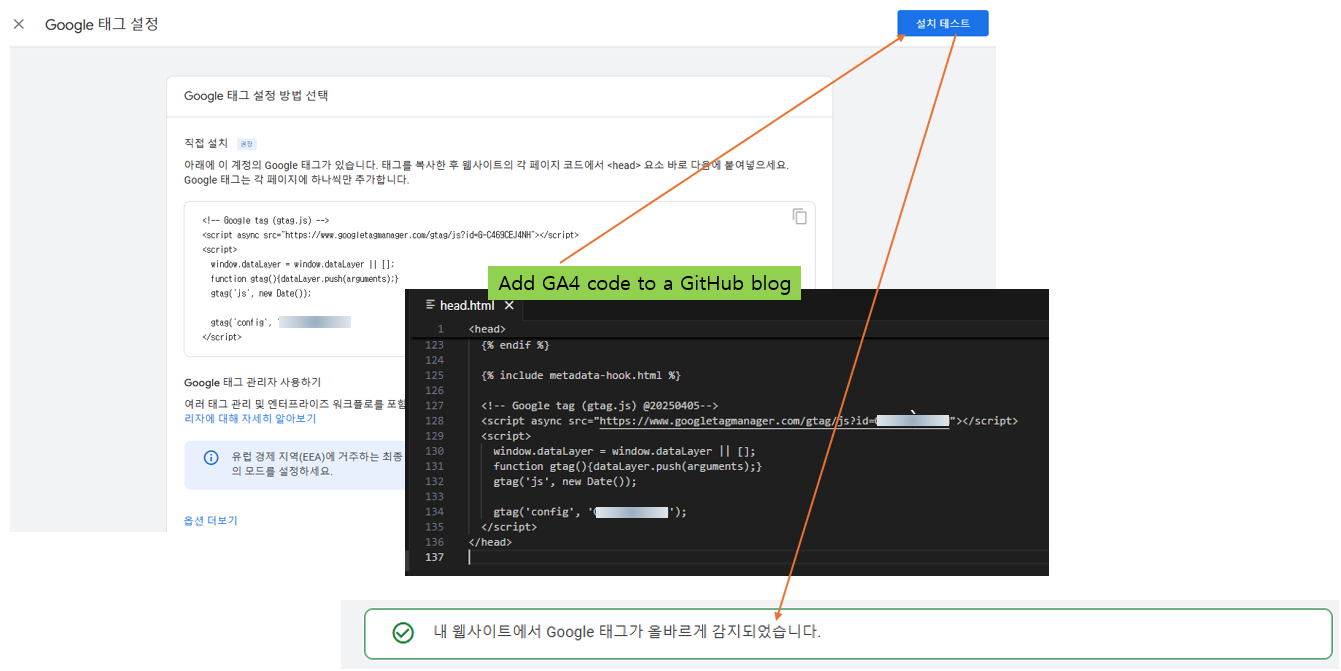
- Once the web stream is created, go to Google Tag Instructions → Copy the provided code → Paste it into your blog’s code, typically in the
_includes/head.htmlfile.
 Adding Google Analytics 4 (GA4) to a Jekyll Blog
This post is licensed under CC BY 4.0 by the author.